Hi lovlies! Today I am going to share with you a very easy DIY decoration for Christmas, or in my case, any time of the year. I love it!
I studied Marketing in college and have a complete love and adoration for magazines and print media. I know that it's a dying art, but something about seeing a stack of magazines in a store, or you know, on my bookshelf because I have no willpower, makes me so happy. But once I own all of the magazines my little heart desires, ultimately they just collect dust and I end up throwing them out after tearing out my favorite ads and articles.
Here is a fun way to recycle them (which you should do anyway, if you are getting rid of them... *steps off my green podium*) and make a fun, colorful Christmas decoration that lasts all year long!
Materials Needed:
- A magazine.
That's it. Maybe a paperclip.
1. First, find an old magazine you have lying around. I recommend using a magazine on the thicker side that has a lot of colorful ads/images because you are only going to see the edges, for the most part. A magazine that is all print will be pretty boring.... unless you are going for a white tree, which is actually a cute idea.... anyway. Tear off the front and back covers and break the spine.
2. I'm showing you these perfume ads, mostly because they are gorgeous (and I love my Daisy perfume... and secretly covet the Michael Kors one..), but also because they don't tear out that easily. See the edges? They kind of were bothersome when making this tree, so I recommend finding a magazine that doesn't have perfume ads to avoid that unnecessary trip-up.
3. Lay the magazine flat and open the first page. **DISCLAIMER: I did this instead of starting with the first page because of my OCD... don't ask. I did the rest of the below steps on the 2nd page (the contents page in the above picture) and then flipped the 1st page back over and did it next.
Feel free to NOT be crazy, and just start on the first page, step 4 below.
4. Take the top right corner of the page and fold it down, creasing it firmly against the spine of the book. Crease the fold so that it lays flat.
5. Take the angled side (the hypotenuse, anyone?) and fold it over down to the left, flush with the spine of the book. Firmly crease so that it lays flat. You'll have a triangle on the bottom, and it kind of looks like a paper airplane.
6. Fold up that little triangle so that it lays evenly with the bottom of the magazine. This will be the bottom of your tree, so you want it to be straight across.
Turn the page and crease the edge of the spine.
Now's the fun part.
Do that on EVERY PAGE until you're done.
I would watch a movie while doing this, or listen to music. Maybe some wine?
:)
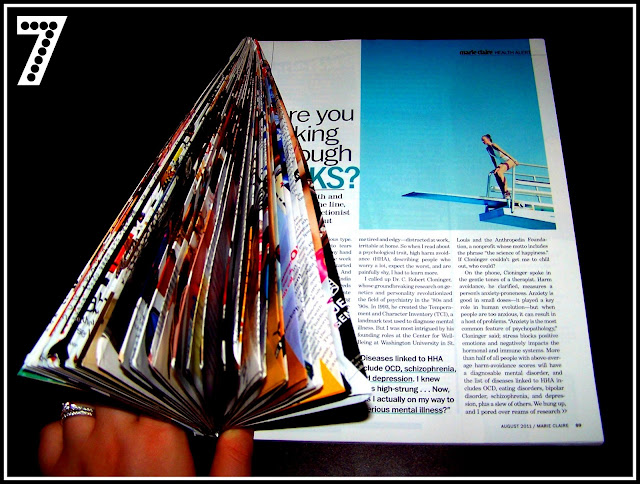
7. Here is about halfway through the magazine. See the tree taking shape? Just doing the 3 folds above turn your magazine into a pretty fir tree!
And voila!, after you fold and fold (and fold and fold!) you have this pretty little tree. If you have a paperclip, it helps to paperclip the first and last pages together, to make the tree keep its shape. It's not necessary, but I used one and liked how it looked better than not.
Tthe picture at the very top is a tree I made last year for Christmas. I keep it out always because I love how it looks, and how it complements the colors in the accessories I paired with it.
I love color!!


